How to Prevent Pipe Freezing with Pipe Heating Cables
How to Prevent Pipe Freezing
SHOP POPULAR PRODUCTS
When temperatures drop dangerously low many homes and buildings are at an increased risk of frozen pipes and valves. When water freezes (20 degrees F) this causes the water to expand; the expansion inside pipes then cause frozen pipes to burst! Prevent your pipes from freezing in the winter with BriskHeat heating cables! Self-Regulating Heating Cable provides pipe freeze protection when you need it the most; self-regulating heating cables are specifically designed for freeze protection and de-icing or thawing of metal or plastic pipes and valves and dangerously cold temperatures; down to negative 40 degrees Fahrenheit or negative 40 degrees Celsius. The rugged industrial grade construction allows heating cables to be a reliable freeze protection solution, even the most extreme cold temperatures.
Why Self-Regulating Heating Cable?
- Automatically adjusts heat output based on surface and ambient temperatures
- No temperature controller is required
- Plug-in ready pre-assembled power cord
- Grounded design for added safety
- Suitable for extreme cold conditions as low as -40°F (-40°C)
- Safe for indoor and outdoor use
- Safe to overlap heating cable for easy installation
Electric heat tracing, heat tape or surface heating, or trace heating maintains and raises the temperature of pipes to prevent freezing. Otherwise known as Trace heating, using heating cable, utilizes an electrical heating element and wraps the length of pipes to deliver heat directly.
BriskHeat's solutions are pre-assembled, easy to install, and plug-and-play! They are even automatically adjust the heat output based on the surface and ambient temperatures. If you are looking for heat tape for pipes, our self regulating heating cable is the ideal solution to prevent pipe freezing! 
Step 1: Select Heating Cable
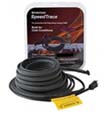
Using the following table, determine the pipe heating cable suitable for your Metal or Plastic (PVC) pipe heating needs. We recommend SpeedTrace Self Regulating Heating Cables

Add 1ft (30cm) to your pipe length for each valve or spigot on your pipe system. The charts assume the lowest outside temper-thick waterproof, fire-resistant thermal insulation. (preformed foam). For protection to -20°F (-29°C), use 1” (25mm) thick insulation.
BriskHeat SpeedTrace Trace Heating Cables are suitable for indoor or outdoor use and are safe to overlap and insulate. With BriskHeat Heating cables, there is no need for a temperature controller as our pipe heating cables automatically adjust the heat output based on surface and ambient temperature.
Step 2: Select Pipe Heating Installation Method for Wrapping Pipe
There are two easy options for installing your heating cable:
Option One: Straight Line Pipe Heating Cable Installation
The simplest type of installation and ideal for smaller diameter pipes (less than 3 inches)
- Simply run the heating cable along the bottom of the pipe, in a stright line, on a lower half of the pipe at either the four or eight o'clock position.
- Attach the heating cable to the pipe by circling the pipe with a piece of fiberglass or aluminum adhesive tape; at 1-foot intervals
- The pipe heater cable should be touching the pipe
- There should not be any large air gaps between the cable and the pipe
NOTE: When attaching the heat cable to your pipe, Do not use vinyl electrical tape, duct tape, metal bands, or wire. Attach the cable to the pipe using only fiberglass or aluminum adhesive tape or plastic cable ties

Option Two: Spiral Wrap Pipe Heating Cable Installation
This provides even heat for larger pipes and is ideal for larger diameter pipes (3 inches or greater)
- Simply wrap the heat cable around the pipe; for the length of the pipe.
- Suspending a loop every 10 feet. To determine the loop length, divide the heating cable length by your pipe length and multiply by 10.
- Attach it to the pipe by circling the pipe with a piece of fiberglass adhesive tape at 1-foot intervals.
- Even out the distance between spirals by sliding the wraps along the pipe.
- The cable should be touching the pipe
- There should not be any large air gaps between the cable and the pipe.
- If excess cable remains at the end of the pipe, double it back along the pipe.

NOTE: When attaching the heat cable to your pipe, Do not use vinyl electrical tape, duct tape, metal bands, or wire. Attach the cable to the pipe using only fiberglass or aluminum adhesive tape or plastic cable ties

Step 3: Install Pipe Insulation
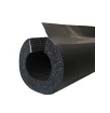
A reliable SpeedTrace heating cable system depends on properly installed and dry, weatherproofed thermal insulation like the INSUL-LOCK DS Flexible Closed Cell Pipe Insulation
- Ensure that at least ½” of preformed foam or equivalent thermal insulation is used and that all piping, including valves, joints, and wall penetrations, has been fully insulated as shown
- For protection to -20°F (-29°C), use 1” (25mm) thick insulation.
- Install the insulation on the piping as soon as possible to minimize the potential for mechanical damage after installation.
- Be sure the SpeedTrace heating cable label is visible on the outside of the thermal insulation.
BriskHeat SpeedTrace Heating Cables are safe to insulate!
Step 4: Finishing The Installation
To prevent damage to the heating cable or cord, secure the power cord (cold lead) with a plastic cable tie, glass cloth tape, or duct tape as shown

Electrical tracing labels indicating the presence of electric pipe heating cable are included with the heating cable. Attach the supplied “Electrical Tracing” labels on the outer surface of the pipe insulation at an interval of one label for every 10 ft (3 m) of pipe to indicate the presence of the SpeedTrace heating cable.
Step 5: Start Heating Tape
- Plug the heating cable into a ground-fault protected outlet.
- Check the circuit breaker to verify power to the cable.
- Standing water in the pipe should feel warm within an hour.
GENERAL INSTRUCTION GUIDELINES
- Install only in accessible locations; do not install behind walls or where the cable would be hidden.
- Do not run the heating cable through walls, ceilings, or floors.
- Connect only to ground-fault protected outlets that have been installed in accordance with all prevailing national and local codes and standards and are protected from rain and other water.
- Do not use on flexible vinyl tubing (such as garden hose)
- Install with a minimum of ½” fire-resistant, waterproof thermal insulation.
- Never use on any pipes that may exceed 150°F (65°C).
- Extension cord may not be used for permanent installations. For temporary installations consult local electrical and fire codes.
TROUBLESHOOTING GUIDE
| PROBLEM | SOLUTION(S) |
| Entire heating cable does not heat | Verify heater is connected to proper voltage. Check to see if there is a resistance reading (not an open circuit) in heater using an ohm meter. |
| Portion of heating cable does not heat | Examine unheated cable for damage. |
| Circuit breaker is tripping | Validate that the circuit breaker is capable of handling the amp requirement of heater. Examine heater and cord for any damage. |